
[Angular 進階議題]使用ComponentFactoryResolver動態產生Component
Angular提供了ComponentFactoryResolver,來協助我們在程式中動態的產生不同的Component,而不用死板板的把所有的Component都寫到View裡面,再判斷是否要顯示某個Component,當遇到呈現方式比較複雜的需求時非常好用,寫出來的程式碼也會漂亮很多。今天就來看看如何透過ComponentFactoryResolver來動態產生需要的Component。
需求說明
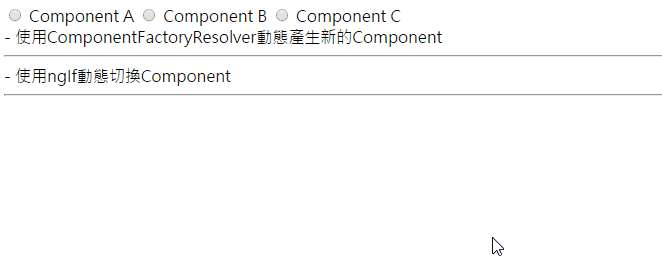
首先看看以下畫面,我們希望點選radio時,可以依照不同的選擇切換不同的Component。

先不考慮動態產生,在只有3個Component的時候,程式碼可以很簡單透過ngIf來判斷Component是否要被產生,可讀性也不至於太差:
<input type="radio" id="showComponentA" name="showComponent" value="componentA" [(ngmodel)]="selectedComponentName">
<label for="showComponentA">Component A</label>

<input type="radio" id="showComponentB" name="showComponent" value="componentB" [(ngmodel)]="selectedComponentName">
<label for="showComponentB">Component B</label>

<input type="radio" id="showComponentC" name="showComponent" value="componentC" [(ngmodel)]="selectedComponentName">
<label for="showComponentC">Component C</label>

<app-component-a *ngif="selectedComponentName === 'componentA'"></app-component-a>
<app-component-b *ngif="selectedComponentName === 'componentB'"></app-component-b>
<app-component-c *ngif="selectedComponentName === 'componentC'"></app-component-c>
不過當選項變得很多,或是可用的選項是透過後端來決定等等比較複雜的狀況時,程式碼很容易就會變得雜亂不好維護,身為優質程序猿,自然不希望發生這種現象,因此我們需要透過動態的方式,來產生Component。也就是今天的主角─ComponentFactoryResolver
建立DynamicComponentDirective
首先我們先建立一個directive,並注入ViewContainerRef,ViewContainerRef可以讓我們得知目前所在的HTML元素中包含的View內容,也可以透過它來改變View的結果(ex: 動態的產生Component、移除某個Component等等)。
import { Directive, ViewContainerRef } from '@angular/core';

@Directive({
 selector: '[appDynamicComponent]'
})
export class DynamicComponentDirective {

 constructor(public viewContainerRef: ViewContainerRef) { }

}
接著我們要套用這個directive到需要動態產生Component的容器上,我們可以簡單的套用
<input type="radio" id="showComponentA" name="showComponent" value="componentA" (change)="displayComponent('componentA')">
<label for="showComponentA">Component A</label>

<input type="radio" id="showComponentB" name="showComponent" value="componentB" (change)="displayComponent('componentB')">
<label for="showComponentB">Component B</label>

<input type="radio" id="showComponentC" name="showComponent" value="componentC" (change)="displayComponent('componentC')">
<label for="showComponentC">Component C</label>

<ng-template appdynamiccomponent=""></ng-template>
原來的3行Components這時就濃縮成只剩下一行了,同時我們也不用看到一堆髒髒的ngIf,View的呈現頓時清爽了許多;同時我們替radiobox加入change事件,來決定要動態產生哪一個Component,-而接下來就是動態產生的重頭戲啦!
使用ComponentFactoryResolver動態產生Component
直接看程式碼:
export class AppComponent {

 @ViewChild(DynamicComponentDirective) componentHost: DynamicComponentDirective;

 constructor(
   private dynamicComponentService: DynamicComponentService,
   private componentFactoryResolver: ComponentFactoryResolver) {

 }

 displayComponent(componentName: string) {
   const componentFactory = this.componentFactoryResolver.resolveComponentFactory(
     this.dynamicComponentService.getComponent(componentName));

   const viewContainerRef = this.componentHost.viewContainerRef;

   viewContainerRef.clear();
   const componentRef = viewContainerRef.createComponent(componentFactory);
 }
}
在這邊我們做了幾件事情:
1. 使用ViewChild取得要動態放置Component的directive(componentHost)
2. 注入ComponentFactoryResolver
3. 在displayComponent中,使用ComponentFactoryResolver.resolveComponentFactory來建立一個ComponentFactory
4. 透過componentHost的ViewContainerRef,將內容先清空(viewContainerRef.clear())
5. 透過viewContainerRef.createComponent(componentFactory),產生我們需要的Component並放入componentHost之中
至於如何決定要產生哪個Component中呢,這裡我們額外建立了一個DynamicComponentService,來決定要產生哪個Component,程式碼看起來如下
@Injectable()
export class DynamicComponentService {
 private components = {
   componentA: ComponentAComponent,
   componentB: ComponentBComponent,
   componentC: ComponentCComponent
 }
 constructor() { }

 getComponent(componentName) {
   return this.components[componentName];
 }
}
在Module中加入entryComponents
接下來就是最後一步了,由於我們的Component是動態產生,而不是直接透過View上的selector產生的,為了確保能夠產生動態的Component,我們還需要在所屬的Module中加入一個entryComponents陣列
@NgModule({
 /* 以上省略... */
 entryComponents: [
   ComponentAComponent,
   ComponentBComponent,
   ComponentCComponent
 ],
 /* 以下省略... */
})
export class AppModule { }
就完成整個動態產生Component的工作啦!最終結果如下:
畫面上的結果看起來一樣,但是程式碼的分工更加明確,彈性也更高,後續要維護調整或增加新的Component也更容易囉。