
使用 SimpleWebAuthn 實現 Passkeys 無密碼登入
前幾天看到「PAPAYA電腦教室」的影片,發現 Google 驗證也支援 Passkeys 了,實際使用的體驗感覺非常的棒,也好奇我們自己是否能提供一樣的服務,就做了一些研究,發現果然可行,目前常用的作業系統與行動裝置都支援了,這篇文章就筆記一下如何用 SimpleWebAuthn 套件來實踐 Passkeys 無密碼等入功能。
影片支援:
基本概念
簡介 WebAuthn
WebAuthn 是 W3C 推出的網頁驗證標準,目前大多數的主流瀏覽器已經支援,透過 WebAuthn 標準,我們可以輕易地實現無密碼登入服務。
簡介 Passkeys
Passkeys 是基於 FIDO 聯盟 標準的一種驗證方式,目的是用來取代密碼,使用者不再需要記憶密碼即可登入各種服務,同時更安全也更方便。
Passkeys 以 WebAuthn 為基礎實作,同時透過作業系統或行動裝置的原生支援,讓我們除了可以用 WebAuthn 實現無密碼登入外,也可以透過不同裝置進行登入;例如我在電腦上要進行 Google 登入,但可以使用我的手機進行授權,即可正常登入 Google,在這種情況下驗證的資訊還是來自手機,電腦上不會儲存任何驗證資訊。因此 Passkeys 除了可以當成多因素驗證外,也可以用來當作登入的備援,避免電腦重灌或遺失等情境。
WebAuthn 基本流程
WebAuthn 基本上會分成兩個流程,第一個是註冊、第二的是登入
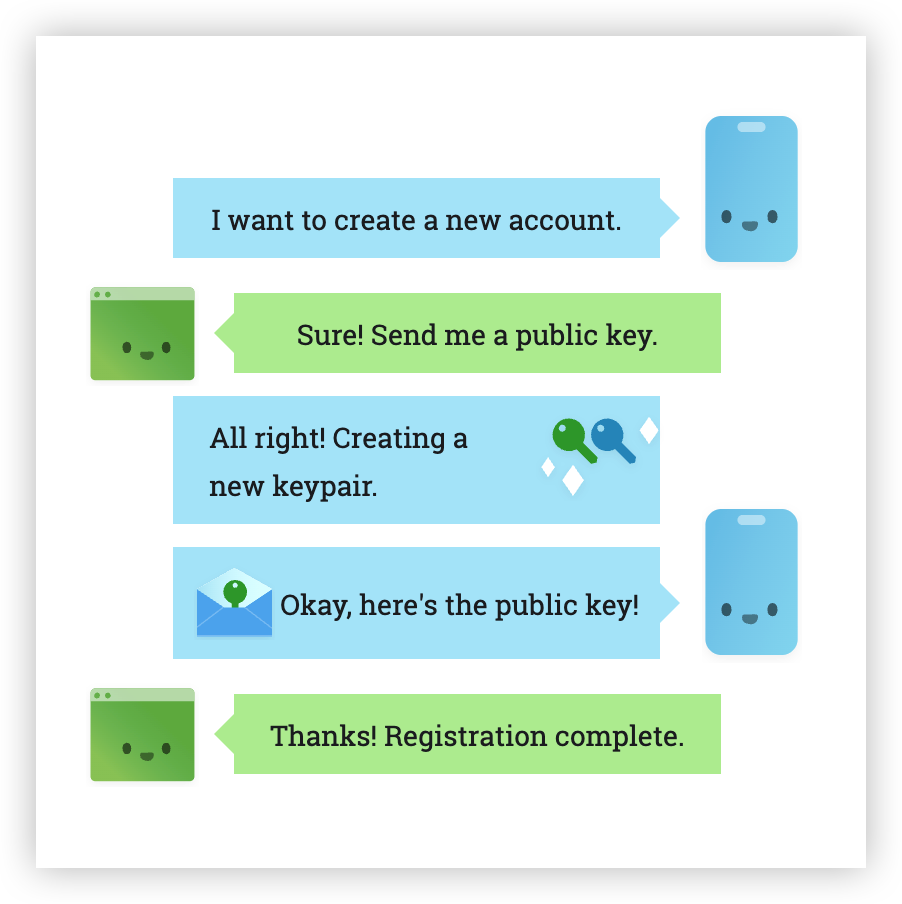
註冊過程中,我們會在電腦中產生一組公私鑰,瀏覽器會將私鑰儲存起來,同時將公鑰提交到伺服器上,因此伺服器端只會儲存公鑰而已,將密碼拆成兩份儲存,也可以一定程度避免密碼從伺服器端流失的風險。
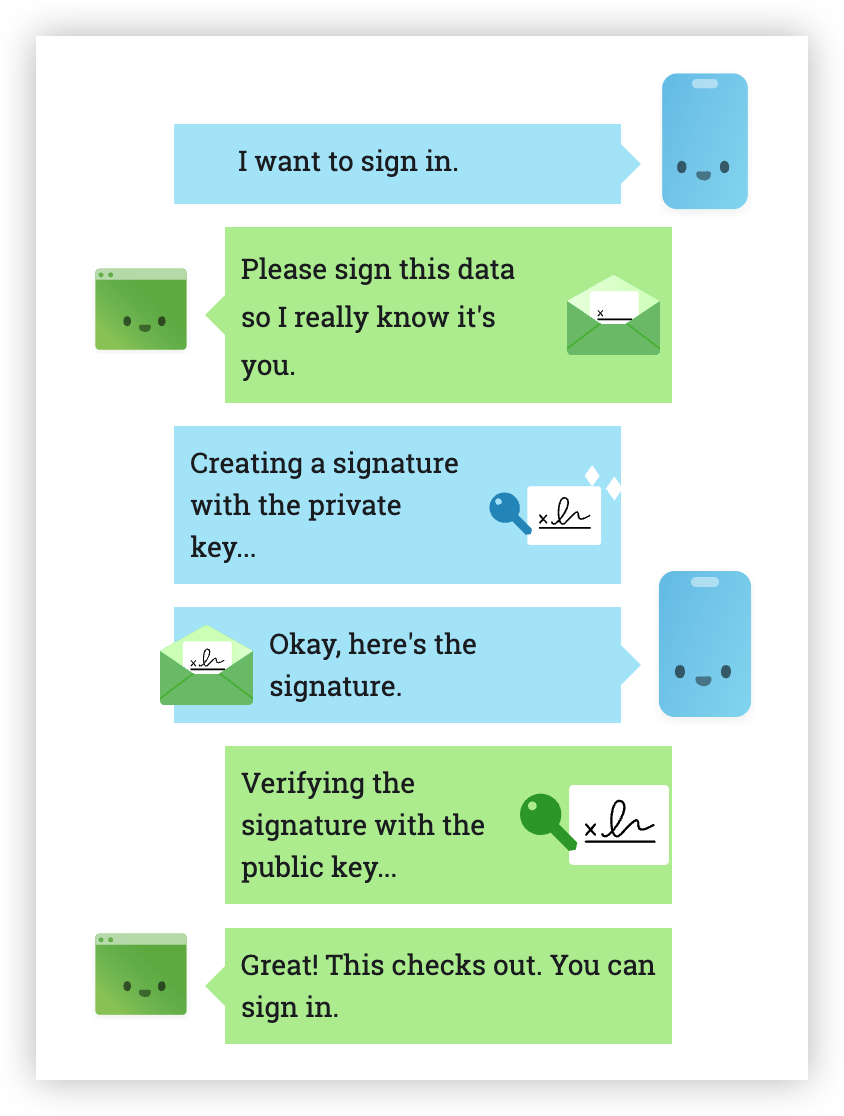
登入過程中,瀏覽器會先依照要登入的使用者向伺服器請求一組挑戰碼 (challange),之後瀏覽器會使用網站上的私鑰進行簽章,並傳到伺服器上,因此伺服器只需要用使用者的公鑰驗證簽章即可完成驗證流程。
這樣的流程很像我們在使用 SSH 登入時,也可以在電腦端建立一組公私鑰,之後只要把公鑰傳到伺服器上,即可不需要輸入密碼就能登入 SSH 伺服器。
當然,這都是在單一個裝置上完成,而在作業系統的支援下,我們也可以選擇使用其他裝置註冊、或用其他裝置登入。
使用 SimpleAuthn 實現 Passkeys
以下筆記關鍵的程式碼:
後端程式
安裝套件
npm install @simplewebauthn/server
重點程式碼
以下是 express 的範例程式,要完成註冊與登入功能,我們需要幾個 endpoint,同時還準備一些共用的變數
const rpName = 'fullstack-ladder-webauthn'; // 伺服器名稱
const rpId = 'localhost'; // 伺服器 id,通常是網域名稱
const expectedOrigin = 'http://localhost:4200'; // 允許驗證的來源
相關 import 的程式
import {
  verifyRegistrationResponse,
  VerifiedRegistrationResponse,
  generateRegistrationOptions,
  generateAuthenticationOptions,
  verifyAuthenticationResponse,
  VerifiedAuthenticationResponse,
} from '@simplewebauthn/server';
開始註冊裝置
在註冊裝置開始前,我們可以向伺服器取得一個 challenge,伺服器在這時候可以先把使用者和對應的 challenge 儲存下來,以便後續驗證時使用。
app.post('/device-register/start', (req, res) => {
  // 實際上可能是從 jwt token 取得使用者帳號
  let username = req.body.username;

  // (資料庫操作) 找出使用者目前的所有驗證器
  const userAuthenticators = getUserRegisteredAuthenticators(username);

  // 產生裝置註冊選項
  // generateRegistrationOptions 為 SimpleWebAuthn 提供的 API
  const options = generateRegistrationOptions({
    rpName,
    rpID: rpId,
    userID: username,
    userName: username,
    attestationType: 'direct',
    authenticatorSelection: {
      residentKey: 'required',
      userVerification: 'preferred'
    },
    // 設定要排除的驗證器,避免驗證器重複註冊
    excludeCredentials: userAuthenticators.map(
      (authenticator: UserAuthenticator) => ({
        id: Buffer.from(authenticator.credentialID, 'base64'),
        type: 'public-key',
        transports: authenticator.transports,
      })
    ),
    timeout: 60000,
  });

  // (資料庫操作)
  // 將 challenge 存入資料庫
  // 實務上 challenge 是會到期的,到期時間依照 options 的 timeout 設定
  // 所以存到 cache 就足夠了,不一定需要存到資料庫
  saveUserRegisterChallenge(username, options.challenge);

  // 回傳設定選項給前端,前端會用這些資料來註冊裝置
  res.json(options);
});
結束註冊裝置
當前端完成裝置註冊後,會將目前的裝置、公鑰等資訊回傳過來,我們可以將這些資訊存到資料庫中,以便之後登入使用。
app.post('/device-register/finish', async (req, res) => {
  const username = req.body.username;

  // (資料庫操作) 從資料庫中取得目前使用者的 challenge
  const expectedChallenge = getUserRegisterChallenge(username);

  // 驗證使用者回應
  let verification: VerifiedRegistrationResponse;
  try {
    verification = await verifyRegistrationResponse({
      // 前端回傳資料
      response: req.body.data,
      // 預期的 challenge
      expectedChallenge,
      // 預期的來源
      expectedOrigin,
      requireUserVerification: true
    });
  } catch (error: any) {
    // 驗證失敗
    return res.status(400).send({ error: error.message });
  }

  // 驗證成功,取得驗證相關資料
  const { verified, registrationInfo } = verification;

  if (verified && registrationInfo) {
    // 註冊使用的驗證器
    const { credentialPublicKey, credentialID, counter } = registrationInfo;

    // 新的驗證器資訊
    const newAuthenticator: UserAuthenticator = {
      credentialID: convertBase64(credentialID),
      credentialPublicKey: convertBase64(credentialPublicKey),
      counter,
      transports: req.body.data.response.transports,
    };

    // (資料庫操作) 註冊驗測器,儲存到資料庫中
    registerUserAuthenticator(username, newAuthenticator);

    // (資料庫操作) 清除資料庫中目前使用者的 challenge
    clearUserRegisterChallenge(username);

    return res.status(200).send(true);
  }

  res.status(500).send(false);
});
開始登入
開始登入時,一樣需要一個 challenge,前端會使用已註冊的裝置進行簽章
app.post('/login/start', (req, res) => {
  const username = req.body.username;

  // (資料庫操作) 取得使用者註冊的驗證器
  const userAuthenticators = getUserRegisteredAuthenticators(username);

  // 產生裝置登入選項
  const options = generateAuthenticationOptions({
    allowCredentials: userAuthenticators.map((authenticator) => ({
      id: Buffer.from(authenticator.credentialID, 'base64'),
      type: 'public-key',
      transports: authenticator.transports,
    })),
    userVerification: 'preferred',
  });

  // (資料庫操作)
  // 將 challenge 存入資料庫
  // 實務上 challenge 是會到期的,到期時間依照 options 的 timeout 設定
  // 所以存到 cache 就足夠了,不一定需要存到資料庫
  saveUserLoginChallenge(username, options.challenge);

  res.json(options);
});
結束登入
前端的登入過程,會透過以註冊的裝置對 challenge 進行簽章,之後將資訊回傳給伺服器
app.post('/login/finish', async (req, res) => {
  const username = req.body.username;

  // (資料庫操作) 取得使用者目前的 challenge
  const expectedChallenge = getUserLoginChallenge(username);

  // (資料庫操作) 從資料庫中檢查是否包含符合的驗證器
  const authenticators = getUserRegisteredAuthenticators(username);

  if (!authenticators || !authenticators.length) {
    return res.status(400).send({ error: 'User is not registered any device' });
  }

  const authenticator = authenticators.find(
    (device) => device.credentialID === req.body.data.id
  );
  if (!authenticator) {
    return res
      .status(400)
      .send({ error: 'User is not registered this device' });
  }

  // 執行驗證
  let verification: VerifiedAuthenticationResponse;
  try {
    verification = await verifyAuthenticationResponse({
      response: req.body.data,
      expectedChallenge,
      expectedOrigin,
      expectedRPID: rpId,
      authenticator: {
        credentialID: Buffer.from(authenticator.credentialID, 'base64'),
        credentialPublicKey: Buffer.from(
          authenticator.credentialPublicKey,
          'base64'
        ),
        counter: authenticator.counter,
        transports: authenticator.transports,
      },
      requireUserVerification: true,
    });
  } catch (error: any) {
    console.error(error);
    return res.status(400).send({ error: error.message });
  }

  const { verified } = verification;
  if (verified) {
    // (資料庫操作) 清除使用者 challenge
    clearUserLoginChallenge(username);

    // 驗證成功,看是要核發 token 還是要做什麼登入後的事情都可以
    return res.status(200).send(true);
  }

  return res.status(500).send(false);
});
前端程式
安裝套件
npm install @simplewebauthn/browser
重點程式碼
以下是使用 Angular 作為範例的程式碼
裝置註冊
export default class DeviceRegisterComponent {
  private http = inject(HttpClient);
  username = new FormControl('mike');

  private registerDevice(options: any) {
    // 使用 SimpleWebAuthn 提供的 startRegistration 開始進行裝置註冊
    return defer(() => startRegistration(options));
  }

  private getRegistrationOptions(username: string) {
    return this.http.post<any>('http://localhost:3000/device-register/start', {
      username,
    });
  }

  private finishRegistration(username: string, data: any) {
    return this.http.post<boolean>(
      'http://localhost:3000/device-register/finish',
      { username, data }
    );
  }

  async register() {
    const username = this.username.value || '';
    if (!username) {
      return;
    }

    of(username)
      .pipe(
        // 1. 從後端取得註冊裝置時使用 WebAuthn 需要的設定資訊
        switchMap((username) => this.getRegistrationOptions(username)),
        // 2. 使用 WebAuthn API 註冊裝置
        switchMap((options) => this.registerDevice(options)),
        // 3. 將裝置註冊資訊傳回後端
        switchMap((data) => this.finishRegistration(username, data))
      )
      .subscribe({
        next: (success: boolean) => {
          if (success) {
            console.log(success);
            alert('Successfully created using webAuthn');
          }
        },
        error: (error: any) => {
          console.log(error);
        },
      });
  }
}
裝置登入
export default class LoginComponent {
  private http = inject(HttpClient);
  username = new FormControl('mike');

  private deviceAuthentication(options: any) {
    // 使用 SimpleWebAuthn 提供的 startRegistration 開始進行裝置登入
    return defer(() => startAuthentication(options));
  }

  private getLoginOptions(username: string) {
    return this.http.post<any>('http://localhost:3000/login/start', {
      username,
    });
  }

  private finishLogin(username: string, data: any) {
    return this.http.post<any>('http://localhost:3000/login/finish', {
      username,
      data,
    });
  }

  async login() {
    const username = this.username.value || '';
    if (!username) {
      return;
    }

    of(username)
      .pipe(
        // 1. 從後端取得登入裝置時使用 WebAuthn 需要的設定資訊
        switchMap((username) => this.getLoginOptions(username)),
        // 2. 使用 WebAuthn API 驗證裝置
        switchMap((options) => this.deviceAuthentication(options)),
        // 3. 將裝置驗證結果傳回後端
        switchMap((data) => this.finishLogin(username, data))
      )
      .subscribe({
        next: (success: any) => {
          console.log(success);
        },
      });
  }
}
成果展示
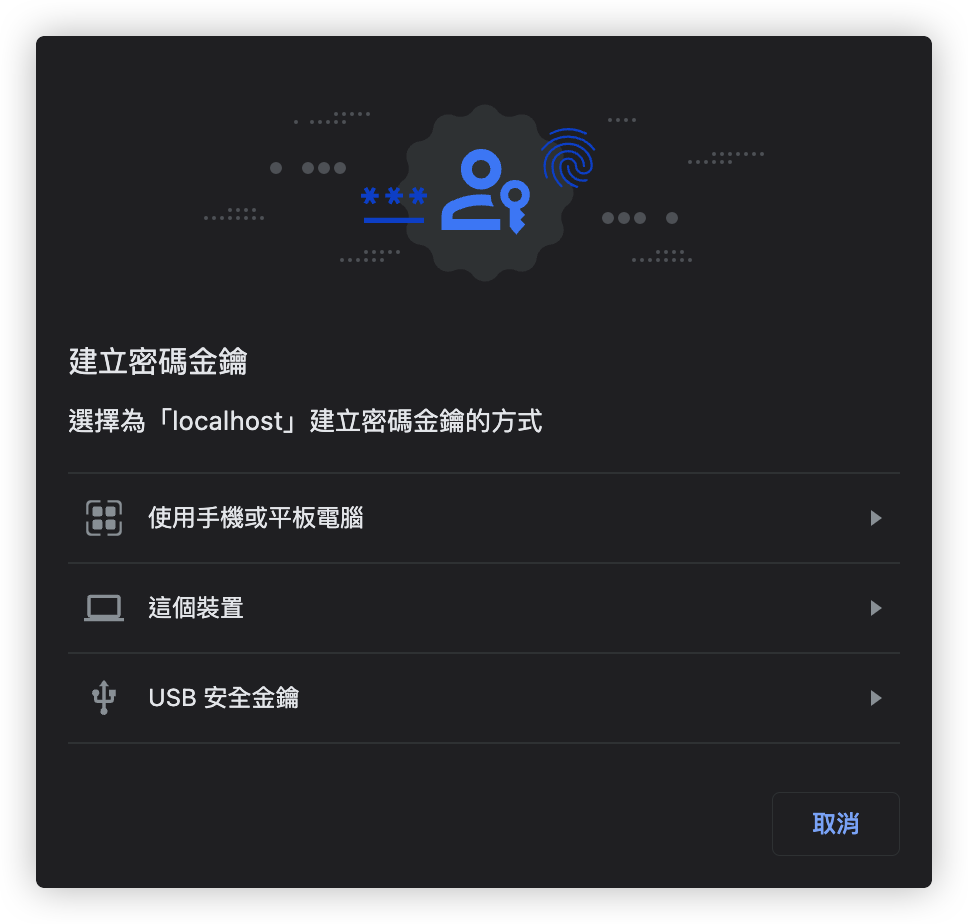
當開始註冊裝置時,瀏覽器會提示是否要建立金鑰密碼,也就是 Passkeys。
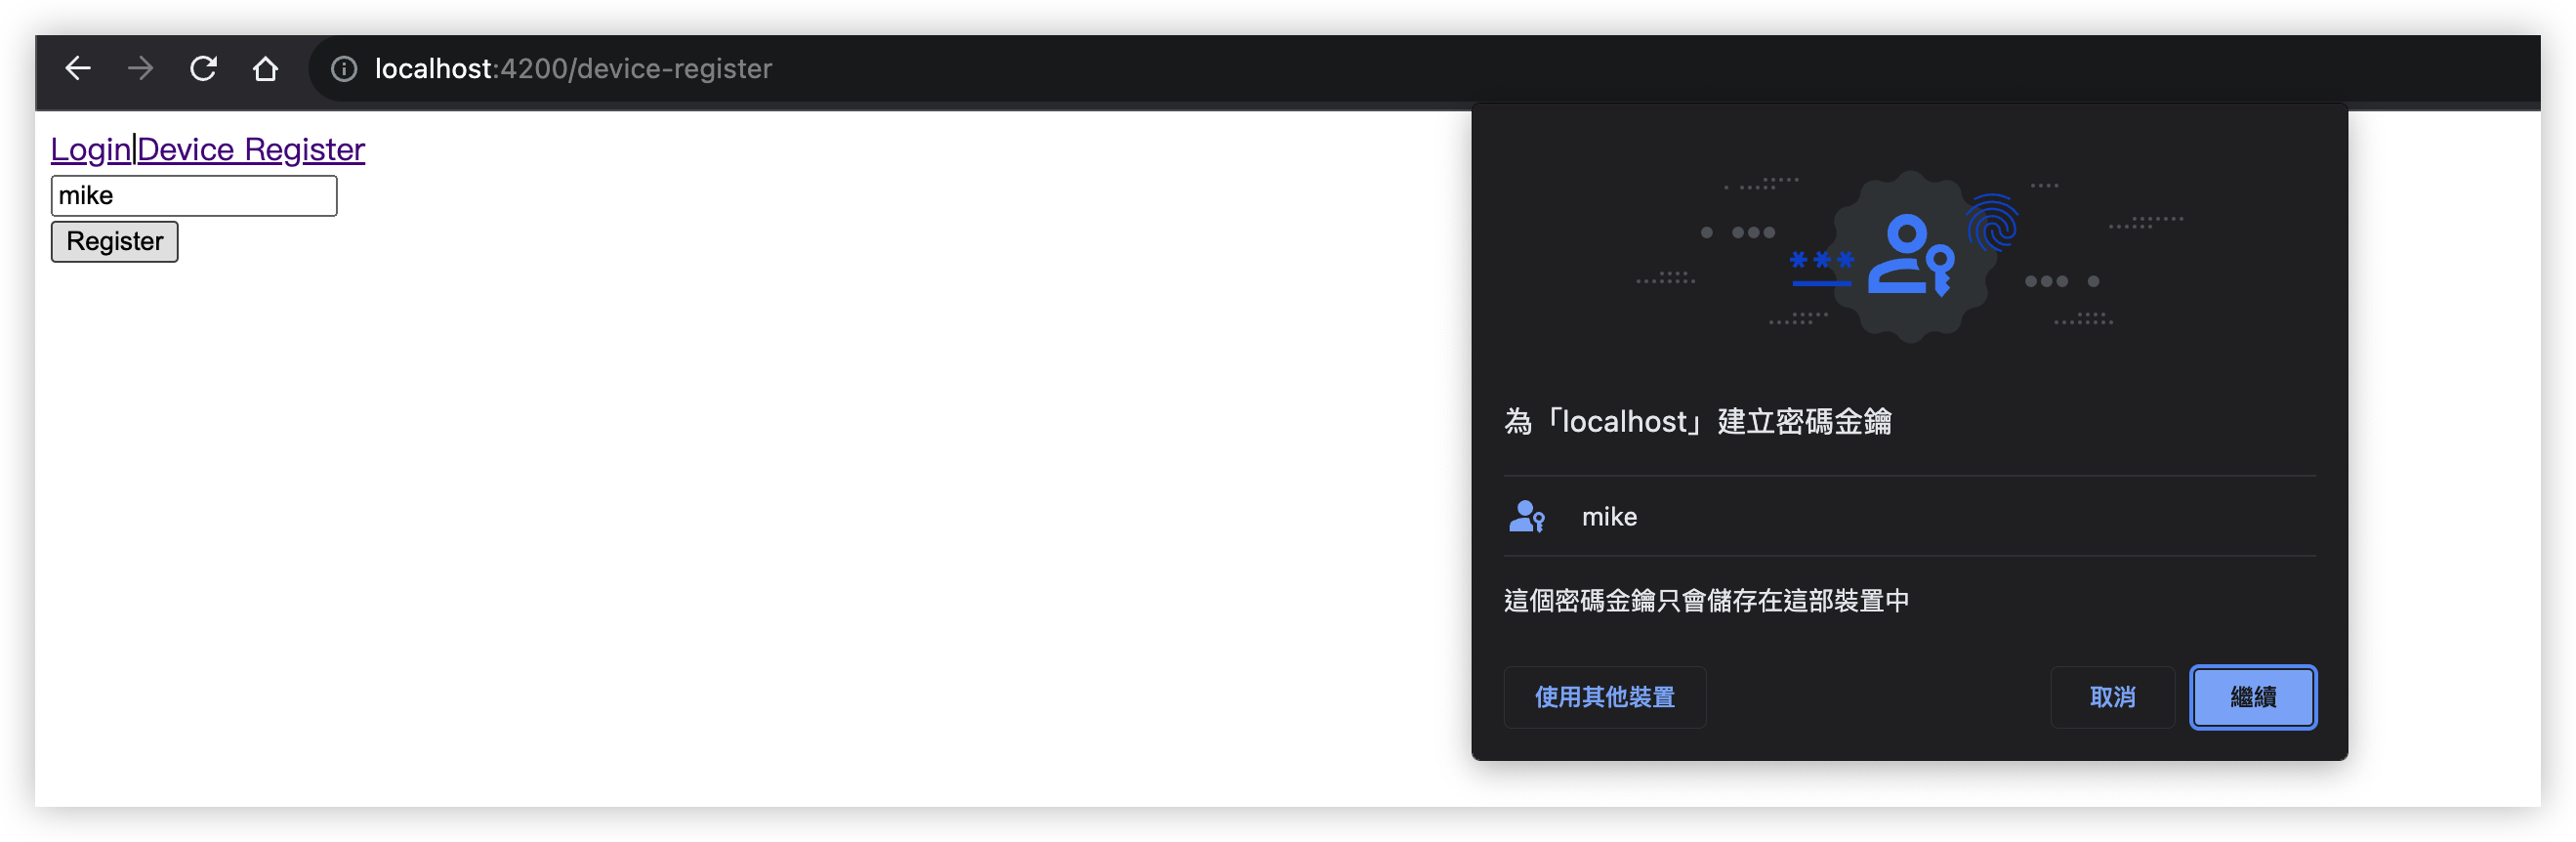
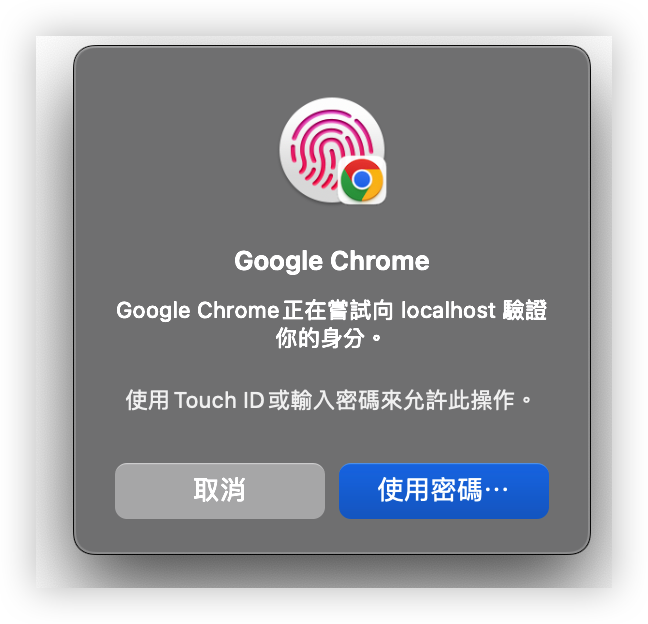
按下「繼續」後,會直接在目前電腦註冊金鑰密碼,同時也要驗證目前的使用者,這時候依照作業系統與設定不同,可能是使用 Touch ID、系統登入密碼或是 Windows Hello 等等。
除此之外,在註冊裝置時,如果按下「使用其他裝置」,就會出現 QR Code,這時候我們只要拿支援金鑰密碼的裝置出來掃描,即可註冊該裝置,同樣的該裝置上可能也會有自己的驗證程序。

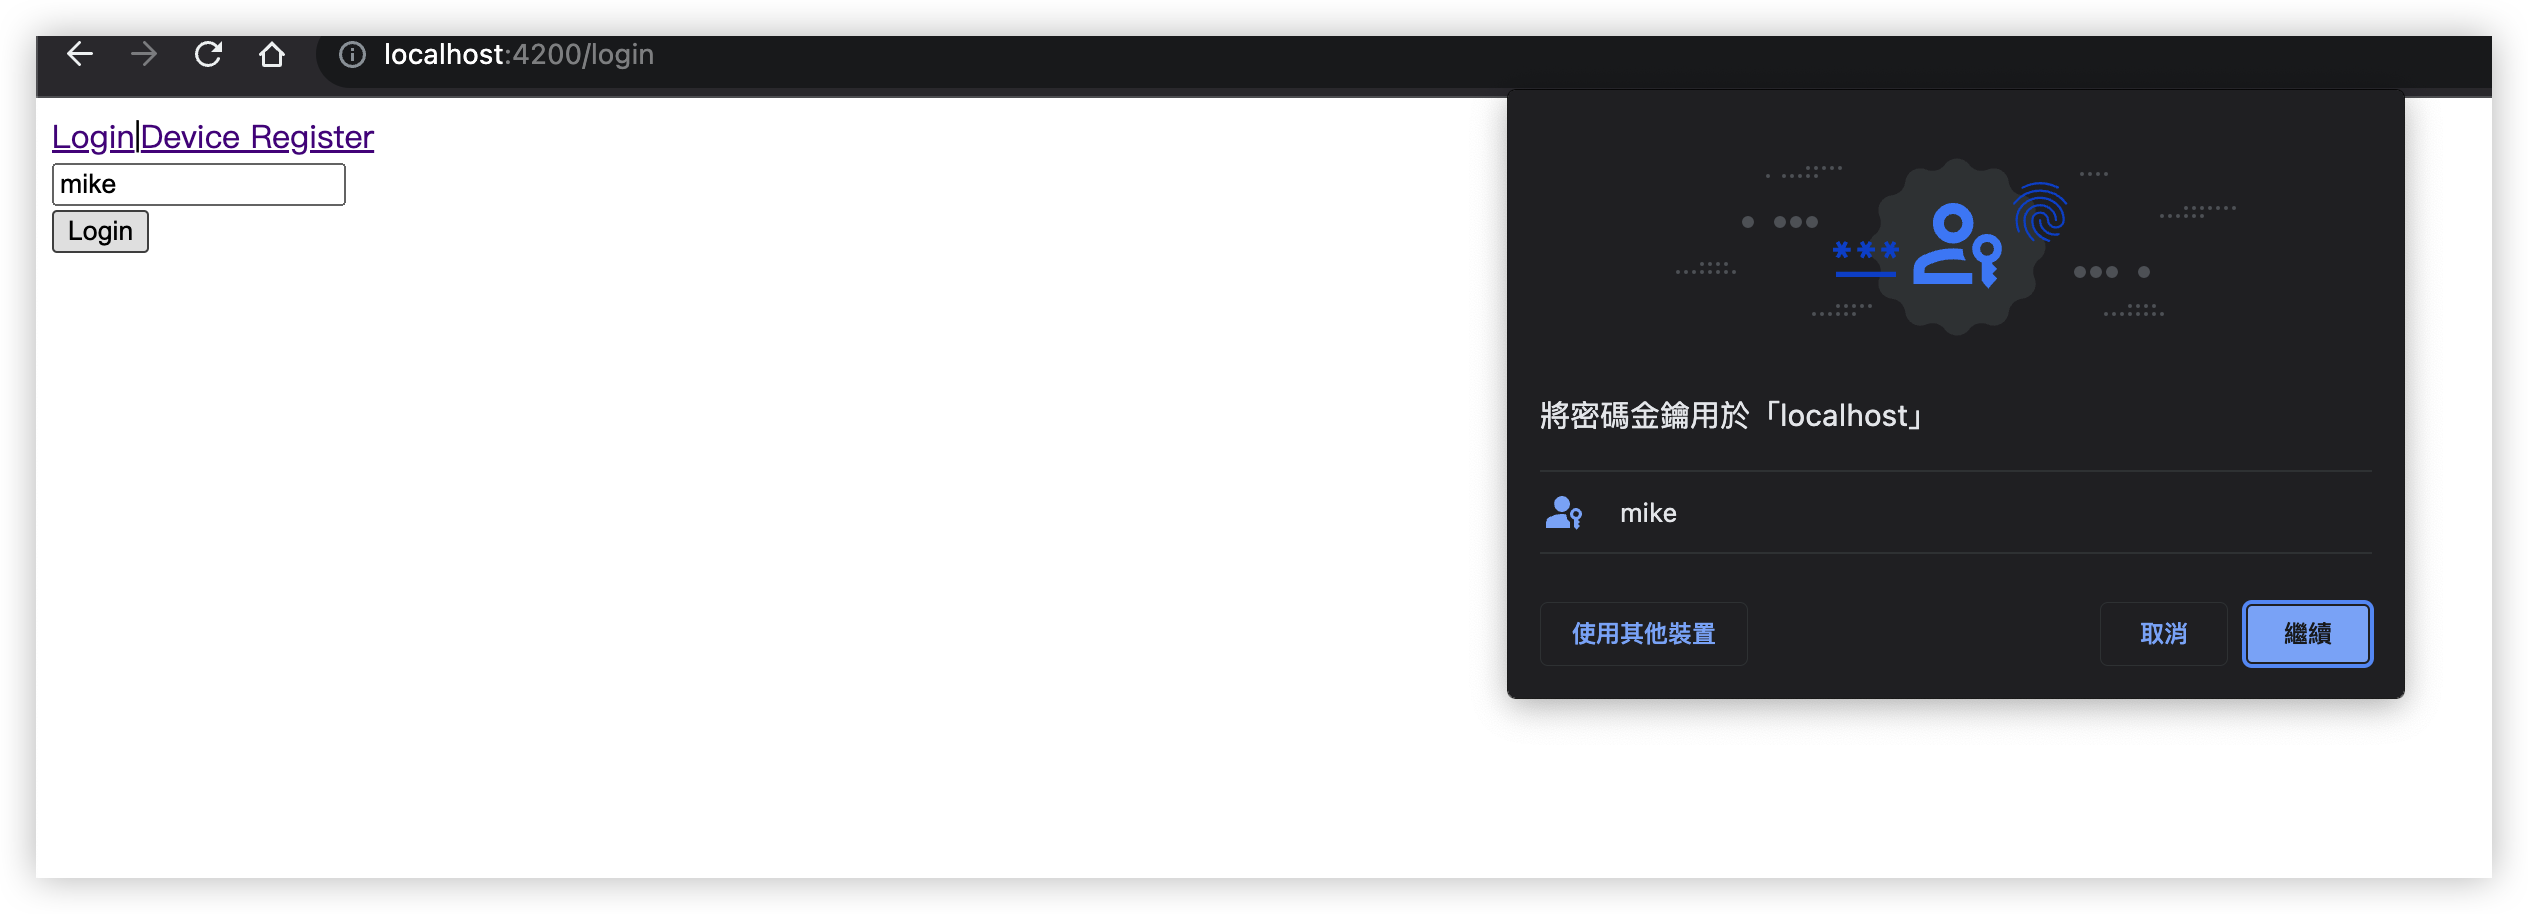
登入的流程也是雷同,如果目前的裝置有註冊過,會直接跳是否要用目前裝置登入,如果沒有註冊過,就會出現 QR Code,讓我們可以用其他裝置登入。
結語
在這次的實作過程,可以發現 Passkeys 確實是一種相對安全又方便的登入方式,而且目前瀏覽器和作業系統的支援度也越來越高,可惜目前支援的網站還不多,但個人覺得很有潛力,希望未來更多的服務會開始支援 Passkeys 的登入方式!